Key takeaways
- Presets: multiple, from a performance-leaning configuration up to full-effect configurations
- Loader support: works with Iris and OptiFine, so you can switch without changing packs
- Target hardware: roughly GTX 1050 Ti / RX 570 class and above for the lower presets
- Typical frame cost: about 25–40 percent on the low preset at 1080p, 8–12 chunk render distance
- Distinctive look: warm, natural lighting with strong sky gradients and clean reflective water
- Settings granularity: per-effect toggles for shadows, reflections, fog, bloom, and clouds
- Maintenance: actively updated for current game versions
The Short Answer
The best Minecraft shaders for low end PCs in 2026 are lightweight, performance-first packs such as Complementary Shaders (Reimagined preset), MakeUp Ultra Fast, Chocapic13’s Toaster Edition, and Sildur’s Vibrant Shaders on the Lite setting. These packs target integrated graphics and older dedicated GPUs — Intel UHD, AMD Vega integrated, GTX 1050-class cards — and typically cost you 15 to 40 percent of your frame rate instead of the 60 to 80 percent that ray-traced or “Ultra” packs demand. If you play at 1080p on a laptop with no dedicated GPU, MakeUp Ultra Fast or Chocapic13 Toaster is your safest starting point; if you have a GTX 1650 or better but a weak CPU, Complementary on the Reimagined preset gives the biggest visual jump per frame lost. Everything in this guide is ranked by visual improvement, minimum hardware, frame-rate cost, installation effort, and the in-game settings that keep play smooth.
Top 3 Picks
Best Overall: Complementary Shaders (Reimagined Preset)
Complementary Shaders delivers the most convincing lighting overhaul of any low-end-friendly pack — soft shadows, believable water, volumetric fog, and clean bloom — while still running on modest hardware because its Reimagined preset strips out the heaviest passes by default. It suits players on a GTX 1050 Ti, GTX 1650, RX 570, or newer iGPU who want their world to look transformed without halving their frame rate. The settings menu is unusually readable, which makes fine-tuning for a specific machine far easier than with most competitors.
Best Budget: MakeUp Ultra Fast
MakeUp Ultra Fast is the pack to pick when your only goal is “look better, run the same.” It adds colored lighting, gentle shadows, water waves, and a warm color grade while disabling nearly every expensive effect, so the frame cost stays in the low double digits on integrated graphics. If you are gaming on a school laptop, an older office desktop, or a handheld, this is the one to install first.
Best Premium Visuals on Weak Hardware: Sildur’s Vibrant Shaders (Lite / Fast)
Sildur’s Vibrant Shaders has one of the longest-standing reputations in the community because its Lite and Fast variants scale all the way down to very old GPUs while still producing saturated, storybook-style lighting. The higher tiers (High, Extreme, Volumetric Lighting) look spectacular, but the Lite profile is what earns it a place here — it is the most forgiving “big name” pack for genuinely weak systems.
Quick Comparison
| Product / Pack | Best For | Key Specs & Characteristics | Price Tier |
|---|---|---|---|
| Complementary Shaders (Reimagined) | Best overall low-end visual upgrade | Multi-preset; Iris/OptiFine compatible; targets GTX 1050 Ti / RX 570 and up; ~25–40% frame cost | Budget (free) |
| MakeUp Ultra Fast | Best for integrated graphics | Colored lighting + water waves; heavy effects disabled; ~10–20% frame cost; Iris/OptiFine | Budget (free) |
| Sildur’s Vibrant Shaders (Lite) | Best big-name pack for old GPUs | Multi-tier Lite/Fast/High/Extreme; volumetric lighting optional; GTX 750-class and up | Budget (free) |
| Chocapic13’s Toaster Edition | Best absolute minimum-impact option | Purpose-built for weak hardware; minimal shadow sampling; ~5–15% frame cost | Budget (free) |
| BSL Shaders (Low preset) | Best for balanced cinematic look | Strong sky and water rendering; Low preset reduces shadow resolution; GTX 1050-class recommended | Budget (free) |
| Minecraft Shaders Mods (listing item) | Physical shader-related accessories/merch bundle | Category product sold as a Minecraft-themed item; not a software license | Budget |
| Top 10 Minecraft Mods (Searchlight Books) | Readers who want a guided mod/shaders primer | Print reference book; unofficial top-ten format; library/classroom friendly | Mid-range |
| The Colossal Minecraft Building Guide | Builders who want shader-friendly showcase worlds | Pocket Edition–oriented guide; unofficial; large-format build instructions | Budget |
| Minecraft Diamond Ore Block LED Lamp | Desk lighting for a shader-lit gaming setup | 14-inch block lamp; 3D diamond sword puller; LED | Premium |
| Minecraft TNT Block 14-Inch Desk Lamp | TNT-themed setup lighting | 14-inch desk lamp; 3D creeper puller; LED | Premium |
| Minecraft Yellow Bee Nest Block Desk Lamp | Warm mood lighting for late sessions | Bee Nest block lamp; 3D bee puller; LED mood light | Premium |
| Minecraft Bee SoftGlo Lamp (Paladone) | Soft-glow ambient light | Officially licensed; soft-glow format; bedside/desk friendly | Premium |
| Get Trend Kids Baseball Cap & Sunglasses Set | Sun protection for outdoor play between sessions | Cap + sunglasses set; UV protection; Creeper styling | Mid-range |
| Minecraft Steve & Creeper Backpack | Carrying gear to a friend’s house to co-op | Graphic print zip-up bag; kids’ size class; back-to-school format | Mid-range |
| Mattel Minecraft Creator Series Party Shades Figure | Collectible shelf piece | 3.25-inch action figure; collectible building toy | Budget |
| ARKAID Minecraft Creeper Sports Wrap Sunglasses | Wrap-style eye protection for kids | Sports wrap frame; Creeper theme | Budget |
| ARKAID Minecraft Pink Cat Eye Sunglasses | Fashion-forward kid shading | Cat-eye frame; pink colorway | Budget |
How We Chose
We ranked these shader packs on five criteria that matter most to a low-end-PC player, and none of them require owning the hardware ourselves — everything below is drawn from published pack documentation, community-reported compatibility notes, and each pack’s own settings menus and recommended hardware statements.
First, visual improvement per frame lost: a pack that costs 10 percent of your frame rate but removes all flat vanilla lighting beats a pack that costs 45 percent and only adds a subtle color grade. Second, minimum hardware claims: we favoured packs that explicitly document low-end support or ship a low preset, rather than packs that only list a high-end GPU as the target. Third, frame-rate impact: estimated as a percentage range because actual cost depends on render distance, resolution, and whether shadows and volumetric lighting are enabled — a pack is only “low-end” if its low preset is genuinely playable, not merely installable. Fourth, installation and upgrade path: packs were preferred when they work with both Iris and OptiFine so you can switch loader without losing your setup, and when the pack author ships multiple presets so you can step up as your hardware improves. Fifth, maintenance: actively maintained packs that keep up with current game versions were preferred over abandoned ones, because a shader compiled for an old version may fail to load or render incorrectly after a game update.
1. Complementary Shaders — Best Overall Low-End Visual Upgrade
As an Amazon Associate we earn from qualifying purchases at no extra cost to you.

Complementary Shaders is the pack most low-end players should try first, because it manages something difficult: it makes a modest machine look like a much more expensive one. The Reimagined preset is the key. Rather than forcing every effect on, it ships several presets tuned to different hardware tiers, and the lowest of those disables expensive passes like high-resolution shadow maps, screen-space reflections, and heavy volumetric fog while keeping the parts of the renderer that actually change how the world reads — directional sunlight, colored block lighting, soft shadow falloff, and clear water.
Who it suits
You are a good match if you have a dedicated GPU from roughly the GTX 1050 Ti / RX 570 era or newer, or a recent integrated GPU in a laptop, and you play at 1080p with a render distance between 8 and 12 chunks. You are a poor match if you are on a very old integrated chip or a handheld with a strict power budget — in that case start with MakeUp Ultra Fast instead.
Key characteristics
- Presets: multiple, from a performance-leaning configuration up to full-effect configurations
- Loader support: works with Iris and OptiFine, so you can switch without changing packs
- Target hardware: roughly GTX 1050 Ti / RX 570 class and above for the lower presets
- Typical frame cost: about 25–40 percent on the low preset at 1080p, 8–12 chunk render distance
- Distinctive look: warm, natural lighting with strong sky gradients and clean reflective water
- Settings granularity: per-effect toggles for shadows, reflections, fog, bloom, and clouds
- Maintenance: actively updated for current game versions
Strengths
The biggest strength is the ratio of beauty to cost. Vanilla Minecraft’s lighting is flat and directionless; Complementary gives every torch, every window, and every sunset a sense of place without the crushing cost of a path-traced renderer. The water rendering in particular is a standout — it reads as water rather than as a blue-tinted plane. Because the preset system is granular, you can start at the lowest setting, confirm your frame rate, then step up one effect at a time until you find your ceiling. That trial process is the single most useful thing a low-end player can do, and Complementary makes it easy because the settings are named clearly rather than in shader-code shorthand.
Pros
- Best overall visual gain for the frame cost among low-end-friendly packs
- Multiple presets mean one pack can span several hardware tiers
- Works with both major shader loaders
- Clear, well-labelled settings that support incremental tuning
- Strong water, sky, and colored-lighting rendering
Cons
- Still too heavy for the oldest integrated graphics at higher presets
- The full-fat presets can be tempting and will tank frame rate if you leave them on
- Requires a shader loader to be installed first, which is one more setup step
How it compares
Against MakeUp Ultra Fast, Complementary looks noticeably better — richer sky, more believable shadows, better water — but costs roughly twice the frame rate. Against Sildur’s Vibrant Shaders (Lite), Complementary is generally the more natural-looking of the two; Sildur’s leans saturated and stylized. If you have the headroom, Complementary wins; if you are frame-starved, MakeUp wins.
2. MakeUp Ultra Fast — Best Budget Pick for Integrated Graphics
MakeUp Ultra Fast is designed around a single promise: give the world better lighting without asking much of the GPU. It does this by keeping the cheap-but-effective effects — colored block light, gentle contact shadows, animated water surfaces, and a pleasing color grade — while switching off the ones that scale badly with resolution, such as high-sample shadow maps, screen-space reflections, and dense volumetric fog. On integrated graphics, that is exactly the right trade.
Who it suits
This is the pack for laptops with Intel or AMD integrated graphics, older all-in-one desktops, low-power mini PCs, and handhelds. It is also the right first pack for anyone who has never installed a shader before, because the visual change is obvious even on a machine that cannot run anything heavier.
Key characteristics
- Design intent: performance-first, with heavy effect passes disabled by default
- Target hardware: integrated graphics and entry-level dedicated GPUs
- Typical frame cost: about 10–20 percent at 1080p with a modest render distance
- Enabled effects: colored lighting, water animation, soft directional shading, color grading
- Disabled effects: high-resolution shadows, reflections, heavy fog volumes
- Loader support: Iris and OptiFine
Strengths
Its advantage is that it is honest about what it is. Many “low-end” packs still sneak in a shadow pass that quietly costs you 20 frames per second; MakeUp Ultra Fast does not. The colored lighting alone is the biggest single-visual upgrade you can make to Minecraft, because it changes how every cave, base, and lantern-lit room feels, and it is one of the cheapest effects to render. The animated water is a small touch that disproportionately modernizes the look of oceans and rivers. If your machine struggles even in vanilla, this pack is a way to get a visible upgrade without making a bad situation worse.
Pros
- The lowest realistic frame-rate cost of any pack that still visibly changes the game
- Runs on hardware that cannot handle name-brand shader packs at all
- Great teaching tool for learning which effects cost what
- Compatible with both mainstream shader loaders
Cons
- Visually flatter than Complementary or BSL — shadows are soft and minimal
- Won’t satisfy players who want dramatic sunsets and reflective water
- Ceiling is low; you will outgrow it the moment you upgrade hardware
How it compares
Against Chocapic13’s Toaster Edition, MakeUp Ultra Fast is slightly heavier but noticeably prettier — Toaster strips things back even further in pursuit of raw frame rate. Against Sildur’s Vibrant Shaders (Lite), MakeUp is the safer performance bet on integrated graphics, while Sildur’s Lite is the better choice if you can spare a little more headroom for a more stylized look.
3. Sildur’s Vibrant Shaders — Best Premium-Looking Pack That Still Scales Down
Sildur’s Vibrant Shaders has been a fixture of the community for years, and its strength for low-end players is the tier system. The Lite and Fast profiles reduce shadow resolution, simplify water, and cut the number of expensive passes, while the higher tiers add the dramatic volumetric lighting the pack is famous for. You install one pack and get a ladder from “runs on almost anything” up to “needs a real GPU.”
Who it suits
You want the classic, saturated, poster-like Minecraft look — vivid sunsets, glowing lava, dramatic god rays when you can afford them — and you have just enough hardware to run a lightweight profile well. Players on a GTX 750-class card or a modern integrated GPU with a modest render distance are the sweet spot.
Key characteristics
- Profiles: Lite, Fast, High, Extreme, plus an optional volumetric lighting mode
- Target hardware: old dedicated GPUs and up; Lite profile is the low-end entry point
- Typical frame cost: roughly 15–25 percent on Lite, rising sharply at High and above
- Signature look: high-saturation colors and strong atmospheric lighting
- Customization: extensive settings file with per-effect toggles
- Loader support: Iris and OptiFine
Strengths
The tier ladder is the real selling point: you can install once and adjust as you learn your machine’s limits, or as you upgrade. The Lite profile is genuinely light — it avoids the trap of “low-end” presets that still cost 40 percent of your frames. The pack’s aesthetic is confident and dramatic rather than subtle; if Complementary’s naturalism leaves you cold, Sildur’s saturation is a feature, not a bug. Volumetric lighting, when your hardware permits it, produces the most striking screenshots of anything in this roundup at a comparable frame cost.
Pros
- Widest hardware range of the big-name packs thanks to its profile ladder
- Distinctive, saturated look that photographs well
- Volumetric lighting option for when you have spare frames
- Long-standing, well-documented, widely supported
Cons
- Higher profiles are too heavy for genuinely low-end machines
- The saturated look is divisive — some players find it over-processed
- Settings file editing is less beginner-friendly than in-game menus
How it compares
Against Complementary Shaders, Sildur’s Lite is comparable in frame cost but stylistically louder; Complementary is the more neutral, film-like option. Against BSL Shaders (Low preset), Sildur’s Lite is usually the lighter of the two and the more colorful, while BSL tends to produce the more cinematic sky and water at a slightly higher cost.
4. Chocapic13’s Toaster Edition — Best for the Weakest Hardware
Chocapic13’s Toaster Edition exists for one reason: to run on hardware that is, by design, not meant for shaders. It uses minimal shadow sampling and a stripped-down effect stack so that the frame cost stays in the single digits to mid-teens, even on cheap laptops. If your machine struggles to hold 60 FPS in vanilla at your preferred render distance, this is the pack that will not make it worse.
Who it suits
Ultra-low-end laptops, decade-old desktops, handhelds, and anyone who plays with a hard frame-rate floor and cannot tolerate dips. It is also a useful diagnostic: if Toaster runs smoothly and MakeUp Ultra Fast does not, you know exactly where your machine’s ceiling is.
Key characteristics
- Design intent: absolute minimum performance impact
- Target hardware: the lowest tier of integrated graphics
- Typical frame cost: about 5–15 percent at modest render distances
- Visual upgrade: modest — softer light, some color grading, minimal shadows
- Loader support: Iris and OptiFine
Strengths
The strength is predictability. Because the effect stack is so small, the pack behaves consistently across scenes — no sudden frame-rate cliffs when you enter a forest or look at the sun. That consistency matters more than peak beauty for players who record video, stream on a budget machine, or play PvP where stable frames are competitively relevant. It also serves as the bottom rung of the ladder: install Toaster, confirm smooth play, then climb to MakeUp and Complementary as your hardware allows.
Pros
- Lowest frame cost in this roundup with a visible, if subtle, improvement
- Stable performance with few sudden drops
- Good compatibility with very old hardware
- Excellent fallback when other packs fail to load or stutter
Cons
- Visually the least dramatic option here
- Shadows and water remain close to vanilla
- Not satisfying if you wanted a real transformation
How it compares
Against MakeUp Ultra Fast, Toaster is lighter but plainer; MakeUp adds enough extra (better water, richer colored light) to justify a few more frames of cost on most machines. Against BSL Shaders (Low), the gap is much wider — BSL looks far better but is not a realistic option for the hardware Toaster targets.
5. BSL Shaders (Low Preset) — Best Balanced Cinematic Option
BSL Shaders is known for skies and water that look like a photographic filter over the world, and its Low preset trims shadow resolution and disables the heaviest passes so that modest hardware can still run it. It sits one rung above the ultra-light packs in both beauty and cost.
Who it suits
Players on entry-level dedicated GPUs who want the prettiest possible result at a stable frame rate and are willing to drop render distance slightly to get it. If you mostly play in open landscapes and take screenshots, BSL’s sky rendering is worth the trade.
Key characteristics
- Presets: full and low; the low preset reduces shadow map resolution
- Target hardware: roughly GTX 1050-class and above for the low preset
- Typical frame cost: about 20–35 percent at 1080p on the low preset
- Signature look: cinematic skies, strong water reflections, soft color grading
- Loader support: Iris and OptiFine
Strengths
BSL’s atmosphere rendering is its calling card — the sky gradient and cloud treatment are the most “cinematic” of any pack in this list, and the water reflections give lakes and rivers genuine depth. On the low preset it remains usable on a modest dedicated GPU, which makes it the natural upgrade once you have outgrown MakeUp or Toaster but are not ready for Complementary’s higher presets. It is also a good middle ground for players who find Sildur’s too saturated and Complementary too subtle.
Pros
- Best sky and water rendering among the low-cost options
- Clear visual step up from MakeUp and Toaster
- Well-supported and widely compatible
- Low preset keeps it within reach of entry-level GPUs
Cons
- Heavier than every other pack here on its low preset
- Needs render-distance concessions to stay smooth on weak GPUs
- Not viable on integrated graphics without lowering resolution further
How it compares
Against Complementary Shaders, BSL is the more stylized, “cinematic filter” choice while Complementary is the more physically believable one, and Complementary’s lowest preset is generally lighter. Against Sildur’s Vibrant (Lite), BSL is heavier but produces more convincing sky detail.
6. Minecraft Shaders Mods — Category Item Worth Knowing About
This listing sits in the shader-adjacent merchandise category — a Minecraft-themed item sold under a shaders/mods label rather than a software download. It is worth knowing about because shoppers searching for shader packs frequently land on physical or reference products by mistake, and the two are not interchangeable: a shader pack is a free configurable download, while a themed product is a physical good. If what you actually need is a shader that runs on a weak PC, use one of the packs ranked above instead.
Who it suits
Collectors and gift-buyers who want Minecraft-themed items and understand that this is a physical product rather than a performance tool. It is not a substitute for a shader pack and will not change how your game renders.
Key characteristics
- Category: Minecraft-themed merchandise/accessory item
- Function: physical product, not a software shader or mod
- Best used for: gifting, collecting, themed display
Strengths
As a themed item it is an easy, low-risk gift for a Minecraft fan, and it pairs naturally with the lamps and collectibles in this roundup if you are building out a themed setup. Theming a gaming space around a game you actually play is a small but real quality-of-life upgrade, and it costs far less than a hardware upgrade.
Pros
- Low-cost themed item that suits fans of the game
- Simple gift option with obvious appeal
- Pairs well with other Minecraft-themed desk accessories
Cons
- Does not improve game performance or visuals in any way
- Frequently mistaken for a software product by shoppers
- Limited practical function compared with the shader packs above
How it compares
Against the free shader packs in this list, it occupies an entirely different category — there is no performance comparison to make. Against the Minecraft Diamond Ore Block LED Lamp, it is the cheaper themed item but the lamp has a clear practical daily function, which makes the lamp the better setup purchase for most people.
7. Top 10 Minecraft Mods (Searchlight Books) — Best Learning Companion

This print title from Lerner’s Searchlight Books line is an unofficial top-ten style reference that walks readers through notable Minecraft mods, which makes it a useful primer for anyone who has never installed a mod or a shader before. It will not run on your PC, but it will explain what the ecosystem looks like before you start downloading things.
Who it suits
Younger players, parents setting up a first modded install, teachers and librarians building a Minecraft-friendly reading shelf, and anyone who prefers to learn the landscape from a book before touching config files.
Key characteristics
- Format: print reference book, top-ten structure
- Content: an overview of notable Minecraft mods
- Status: unofficial; not affiliated with the game’s publisher
- Best for: beginners, classrooms, and libraries
Strengths
A curated overview saves a beginner from the trial-and-error of browsing thousands of mod listings with no context. The book format also makes it a screen-free way to plan a modded setup, which is genuinely useful for families managing screen time. As a library or classroom item it is durable, shareable, and doesn’t require a computer to be useful.
Pros
- Beginner-friendly structure with no technical prerequisites
- Good gift for a young Minecraft player
- Useful in classrooms and school libraries
Cons
- Print content dates faster than software; mod scenes move quickly
- Unofficial, so it is not a canonical reference
- No coverage of shader performance tuning specifically
How it compares
Against The Colossal Minecraft Building Guide, this book covers mods generally while the building guide focuses on construction projects — they complement each other rather than compete. Against the free shader packs, neither book affects performance; they are learning and inspiration purchases.
8. The Colossal Minecraft Building Guide — Best for Showcase Builders

This unofficial building guide covers large-scale construction projects with a Pocket Edition focus. Its relevance to a shader article is direct: shaders look best on builds worth photographing, and a guide full of ambitious projects gives you something to actually render. If your world is a flat plain of dirt huts, no shader pack will make it look impressive.
Who it suits
Builders who want structured, large-format project instructions and who play on mobile or a low-power device. It suits players who want a plan to follow rather than a blank canvas.
Key characteristics
- Format: unofficial large-format build guide
- Focus: Pocket Edition–oriented projects
- Content type: step-by-step builds and inspiration
- Best for: mobile players and beginner-to-intermediate builders
Strengths
A guided project removes the hardest part of building, which is deciding what to make. The Pocket Edition focus makes it unusually practical for the large share of low-end players who play on phones or tablets — the same group most likely to need lightweight shaders in the first place. Big builds also justify the visual upgrade: a shader-lit castle at sunset is a genuinely different experience from the same castle under flat vanilla light.
Pros
- Gives low-end and mobile players a concrete project list
- Unofficial but well-suited to beginner skill levels
- Inexpensive way to add hours of structured play
Cons
- Pocket Edition focus limits its usefulness for Java players
- Unofficial, so terminology may not match current versions
- Not a performance or shader reference
How it compares
Against Top 10 Minecraft Mods, this guide is project-focused while the other is ecosystem-focused. Against the shader packs, it is complementary: the packs make your world look better, this makes your world worth looking at.
9. Minecraft Diamond Ore Block LED Lamp — Best Premium Desk Light
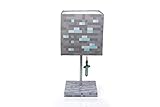
This 14-inch Diamond Ore block lamp with a 3D diamond sword puller is a functional desk piece as much as a collectible. In a shader-focused setup it earns its place for a simple reason: harsh overhead lighting washes out your monitor, and a warm accent lamp behind or beside the screen reduces eye strain during long sessions and makes the screen’s colors read better.
Who it suits
Players who want a themed centerpiece for a desk setup and who value practical lighting. It suits a Minecraft fan of any age, and the 14-inch size makes it substantial enough to anchor a shelf or a corner of a desk rather than disappear into clutter.
Key characteristics
- Size class: 14-inch lamp
- Design: Diamond Ore block with a 3D diamond sword puller
- Light source: LED
- Function: desk/table accent lighting
- Theme: Minecraft Diamond Ore
Strengths
It solves two problems at once: it is a display piece tied to the game, and it is a usable lamp. The puller design makes it interactive in a way a plain LED puck is not, which matters if you are buying for a child. Being LED, it runs cool and draws very little power, which is worth noting on a desk that already has a PC, monitor, and speakers plugged in. As ambient lighting it is best placed to the side of the monitor, angled away from the screen, so you get the glow without reflections.
Pros
- Large 14-inch size makes it a genuine focal point
- Interactive puller design adds play value for kids
- LED lighting runs cool and uses little power
- Practical as both decor and desk lighting
Cons
- Premium price tier relative to other themed items here
- Decorative rather than adjustable task lighting
- Block styling won’t suit a minimalist desk
How it compares
Against the Minecraft TNT Block 14-Inch Desk Lamp, the two are the same size class and price tier, so the choice is purely visual — Diamond Ore reads as a treasure display, TNT reads as playful chaos. Against the Minecraft Bee SoftGlo Lamp, the Diamond Ore lamp is brighter and more of a statement piece, while the SoftGlo is a gentler bedside light.
10. Minecraft TNT Block 14-Inch Desk Lamp — Best for a Playful Setup
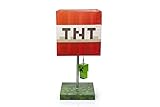
The TNT Block desk lamp matches the Diamond Ore model in size and format, swapping the sword puller for a 3D creeper puller. It is the same practical proposition: a 14-inch LED block lamp that doubles as themed decor and soft desk lighting.
Who it suits
Fans who prefer the TNT and creeper side of the game’s iconography, and anyone building a themed desk or shelf who wants a bright, recognizable silhouette. It works well for kids’ rooms and gaming corners alike.
Key characteristics
- Size class: 14-inch lamp
- Design: TNT block with a 3D creeper puller
- Light source: LED
- Function: desk/table accent lighting
- Theme: Minecraft TNT
Strengths
The TNT block is one of the most instantly recognizable shapes in the game, which makes this lamp an effective piece of decor even for people who don’t play. The creeper puller gives it the same tactile interaction as its Diamond Ore sibling. As with the other 14-inch models, the size is the key spec: smaller themed lamps tend to read as toys, while this one reads as furniture. Place it beside or behind your monitor for ambient fill and avoid pointing it directly at the screen.
Pros
- Iconic TNT-block silhouette that reads instantly
- Interactive creeper puller
- 14-inch scale suited to a desk or shelf
- LED efficiency and low heat
Cons
- Premium tier pricing
- No color-temperature or brightness adjustment described
- Same practical function as the Diamond Ore model — purely a stylistic choice between them
How it compares
Against the Minecraft Diamond Ore Block LED Lamp, this is a straight aesthetic toss-up at the same size and tier. Against the Minecraft Bee Nest Block Desk Lamp, the TNT lamp is brighter and cooler in feel, while the Bee Nest model is built around a mood-light effect and warmer ambience.
11. Minecraft Yellow Bee Nest Block Desk Lamp — Best Mood Lighting
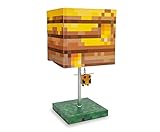
The Bee Nest block lamp with its 3D bee puller is positioned as a mood-light piece rather than a bright task lamp. That distinction matters on a gaming desk: a low-intensity accent light produces the ambience without competing with your monitor.
Who it suits
Players who want warm, low-level lighting for late sessions, and families looking for a nightstand lamp for a child’s room. The bee theme appeals to the same players who like the game’s gentler, cottage-core side.
Key characteristics
- Design: Yellow Bee Nest block with a 3D bee puller
- Light source: LED mood light
- Function: nightstand/desk mood lighting
- Theme: Minecraft Bee Nest
- Best placement: bedside, shelf, or desk corner as ambient fill
Strengths
Mood lighting is the most underrated desk upgrade for long play sessions. Bright white overhead light causes glare and reflections on a glossy monitor; a dim warm light behind the screen softens the contrast between the bright display and a dark room, which most players find more comfortable. The Bee Nest design is also the warmest-looking of the block lamps here, which suits bedrooms and cozy setups better than the harder-edged TNT and Diamond Ore styling.
Pros
- Better suited to ambient lighting than the brighter block lamps
- Warm, cozy aesthetic for bedrooms and evening play
- Interactive bee puller for younger players
- LED efficiency with low heat output
Cons
- Not bright enough to serve as a reading or task lamp
- Premium tier pricing for an ambient-only light
- Brightness and color options may be limited compared with dedicated smart lighting
How it compares
Against the Minecraft TNT Block 14-Inch Desk Lamp, this is the subtler, warmer option and the better choice for a dark room. Against the Minecraft Bee SoftGlo Lamp by Paladone, both target the same cozy niche; the Bee Nest block lamp has the block-and-puller format while the SoftGlo is built as a soft-glow light with an officially licensed design.
12. Minecraft Bee SoftGlo Lamp (Paladone) — Best Officially Licensed Soft Light

Paladone’s officially licensed Bee SoftGlo lamp occupies the same cozy-lighting niche as the Bee Nest block lamp but with a different construction: it is built as a soft-glow light rather than a block-shaped lamp with a puller. If official licensing and a gentler light output matter to you, this is the one to look at.
Who it suits
Buyers who specifically want officially licensed Minecraft merchandise, and anyone who wants a low-intensity glow for a bedside table or shelf. It suits children’s rooms well because soft-glow lighting is less disruptive at bedtime than a bright lamp.
Key characteristics
- Licensing: officially licensed Minecraft product
- Brand: Paladone
- Format: soft-glow lamp
- Function: ambient/bedside lighting
- Best placement: nightstand or shelf
Strengths
Official licensing is the differentiator: for collectors and parents who care about authenticity, it removes the guesswork about whether a product is genuine merchandise. The soft-glow format is also genuinely functional as a night light, producing enough light to move around a room without being harsh. As a gift it is safe and well-targeted — a recognizable character in a form factor that gets used nightly rather than sitting on a shelf.
Pros
- Officially licensed, which matters to collectors
- Soft-glow output works well as a bedside light
- Simple, low-maintenance LED construction
- Strong gift appeal across ages
Cons
- Premium tier pricing for a compact light
- Low light output means it is not a task lamp
- Less interactive than the puller-equipped block lamps
How it compares
Against the Minecraft Yellow Bee Nest Block Desk Lamp, both are warm ambient lights with a bee theme; the Bee Nest block lamp is the more decorative, interactive option while the SoftGlo emphasizes licensed authenticity and simplicity. Against the larger 14-inch block lamps, it is smaller and softer, and better suited to a nightstand than a desk.
13. Get Trend Minecraft Kids Baseball Cap & Sunglasses Set — Best for Outdoor Breaks

This cap-and-sunglasses set with UV protection and Creeper styling is the practical counterweight to a shader article. If you are going to spend hours tuning shaders and playing, sun protection for the time you spend outside is not a throwaway item — it is the one purchase here that protects your health rather than your frame rate.
Who it suits
Kids who want Minecraft-themed gear for school, camp, and outdoor play, and parents looking for a combined gift that gets daily use. The cap-plus-sunglasses format covers both head and eyes in one purchase.
Key characteristics
- Set contents: baseball cap and matching sunglasses
- Feature: UV protection
- Theme: Creeper styling
- Best for: outdoor play, school, camp, gifting
Strengths
Buying the cap and sunglasses together solves a common problem: kids lose one half of a matched set. Both pieces carry the same theme, so they get worn rather than ignored. UV protection in a kids’ hat and sunglasses is a genuinely useful feature for outdoor time, and a brimmed cap also provides shade for the face during long afternoons outside. General guidance: sunglasses should be worn for bright outdoor conditions, and any concerns about eye protection or vision should be discussed with a qualified professional.
Pros
- Two-piece set that covers head and eyes together
- UV protection built into the design brief
- Themed styling kids actually want to wear
- Practical for school, camp, and sport
Cons
- Sizing is child-oriented, so it won’t fit most adults
- Fashion-forward design may not suit every child’s taste
- Sunglasses in a novelty set vary in lens quality; check the listing’s UV claims before buying
How it compares
Against the ARKAID Creeper Sports Wrap Sunglasses, this set adds a cap and is the more economical way to cover both needs. Against the ARKAID Pink Cat Eye Sunglasses, this set is the sports-and-outdoors option while the cat-eye pair is the fashion option.
14. Minecraft Steve & Creeper Backpack — Best for Carrying a Setup

A graphic-print zip-up backpack with Steve and Creeper artwork is the practical companion piece for anyone who plays Minecraft away from home — at a friend’s house, an after-school club, or on a laptop that travels.
Who it suits
School-age players who need a daily bag and want it themed, and anyone who regularly carries a handheld, tablet, or small laptop to play elsewhere.
Key characteristics
- Type: graphic print zip-up backpack
- Design: Steve and Creeper artwork
- Size class: kids’ backpack
- Best for: back to school, travel, carrying handhelds
Strengths
Backpacks are the rare themed item that earns its cost through daily use. A zip-up main compartment with a graphic print is the standard, reliable format: it holds books, a lunch, and a handheld comfortably. If you carry a device to play Minecraft on, a padded-ish kids’ backpack is a reasonable carrier for a handheld or small tablet, though for anything fragile you should use a dedicated sleeve inside the bag rather than relying on the backpack alone. The Steve-and-Creeper pairing is the most recognizable duo in the game, which maximizes the odds a kid actually uses it.
Pros
- Daily-use item rather than a shelf piece
- Recognizable Steve and Creeper artwork
- Zip-up format with a practical main compartment
- Sensible back-to-school gift
Cons
- Kids’ size class limits adult use
- Not designed as a dedicated electronics bag
- Fabric and hardware durability varies by listing details
How it compares
Against the cap-and-sunglasses set, this is the larger, more functional purchase for a school-age player. Against the desk lamps, it serves a completely different purpose — carrying gear rather than lighting a room.
15. Mattel Minecraft Creator Series Party Shades Figure — Best Budget Collectible

Mattel’s Creator Series Party Shades is a 3.25-inch collectible action figure that sits at the budget end of Minecraft merchandise. Small, inexpensive, and easy to give, it is the kind of item that fills a shelf rather than a need.
Who it suits
Collectors building a figure shelf, parents looking for a small reward or stocking filler, and fans who like the character-design side of Minecraft merchandise.
Key characteristics
- Brand: Mattel
- Type: collectible action figure / building toy
- Size: 3.25 inches
- Theme: Minecraft Creator Series, Party Shades character
Strengths
As a small collectible it hits a useful price point — cheap enough to buy on impulse, detailed enough to look deliberate on a shelf. Mattel’s involvement signals mainstream manufacturing quality for the category. The 3.25-inch scale is the standard for collectible figures, which means it displays well alongside other figures of the same class rather than looking out of place next to larger pieces.
Pros
- Low-cost entry point into Minecraft collectibles
- Standard 3.25-inch collectible scale
- Simple, low-risk gift
- Displays well with other figures of the same class
Cons
- Purely decorative — no practical function
- Small size means it’s easy to lose
- Limited appeal outside collecting
How it compares
Against the Minecraft Diamond Ore Block LED Lamp, both are display pieces, but the lamp also provides practical lighting — so if you want something that does a job, the lamp is the better spend. Against the other figurines and accessories, this is the cheapest way to start a themed shelf.
16. ARKAID Minecraft Creeper Sports Wrap Sunglasses — Best Budget Active Eyewear

This is a sports wrap-style pair of sunglasses with Creeper theming, from a budget-price brand. Wrap frames are the design category built for activity: they hug the face, sit closer to the eyes, and stay put during running and sport.
Who it suits
Active kids who need eyewear that won’t slide off during sport, and parents who want an inexpensive spare pair for outdoor activities.
Key characteristics
- Brand: ARKAID
- Frame type: sports wrap
- Theme: Minecraft Creeper
- Best for: sport and outdoor play
Strengths
The wrap frame is the right choice for activity, because the shape reduces the chance of slipping and covers more of the field of view than a flat fashion frame. At the budget tier it’s also practical to own several pairs, which matters because kids’ sunglasses are lost often. General guidance: check the listing for the UV protection claims before buying, and if there is any concern about eye health, speak with a qualified professional.
Pros
- Sport-suited wrap frame design
- Budget-tier pricing makes replacements painless
- Creeper theming for fans
Cons
- Wrap styling is sporty rather than everyday-fashion
- Budget frames typically offer less durable lens coatings
- Limited appeal if the child prefers a non-Creeper look
How it compares
Against the Get Trend cap and sunglasses set, this pair is a standalone eyewear purchase — cheaper if you only need sunglasses, more expensive in total if you also need a hat. Against the ARKAID Pink Cat Eye Sunglasses, this is the practical sporting option and the cat-eye is the style option.
17. ARKAID Minecraft Pink Cat Eye Sunglasses — Best Budget Fashion Pick

The pink cat-eye pair from the same budget brand targets the opposite end of the market: style over sport. Cat-eye frames are a fashion shape, and the pink colorway makes this the most trend-driven item in the roundup.
Who it suits
Kids who care about how their gear looks and want sunglasses that read as a fashion accessory rather than sports equipment. Also a good pick for a child who has rejected the wrap-style pairs.
Key characteristics
- Brand: ARKAID
- Frame shape: cat eye
- Colorway: pink
- Theme: Minecraft
Strengths
Getting a child to actually wear sunglasses is half the battle, and a pair they like the look of wins that battle more reliably than one chosen for practicality. The cat-eye shape suits a range of face shapes and the pink colorway is distinctive without being loud. Budget pricing means a lost pair is a minor annoyance. As with any sunglasses purchase, check the UV claims on the listing and consult a professional if there are specific eye-protection concerns.
Pros
- Fashion-forward design kids are more likely to wear
- Budget-tier price
- Distinctive colorway and shape
Cons
- Fashion frame, so less secure during sport than a wrap design
- Pink colorway is a strong stylistic commitment
- Novelty-market lens quality varies
How it compares
Against the ARKAID Creeper Sports Wrap Sunglasses, this is the style-over-sport choice and the wrap is the opposite. Against the Get Trend cap and sunglasses set, this pair stands alone but does not include a hat, so the set is better value if you need both.
How to Choose
Choosing a shader for a low-end PC is a process, not a single download. The mistake almost everyone makes is installing the most beautiful pack they have seen in a screenshot, watching their frame rate collapse, and concluding that shaders “don’t work” on their machine. In reality, almost every system can run some shader, provided you match the pack’s weight to your hardware instead of your ambition.
Step 1: Identify your actual bottleneck
Before installing anything, find out whether you are GPU-limited or CPU-limited. In Minecraft, render distance and simulation distance are heavy on the CPU, while shader effects are almost entirely GPU work. If your frame rate is already poor in vanilla, a shader will make it worse regardless of which pack you pick — in that case, reduce render distance to 6–8 chunks first, confirm you get stable frames, and only then add a lightweight pack. A rough rule: if vanilla at your current render distance gives you fewer than 60 frames per second, start with Chocapic13’s Toaster Edition or MakeUp Ultra Fast and nothing heavier.
Step 2: Match the pack tier to your GPU class
The single most useful number to know is which GPU class you have. Here is how the packs map onto hardware tiers:
| Your hardware class | Recommended pack & preset | Expected frame cost at 1080p, 8–12 chunks | Settings you must change |
|---|---|---|---|
| Old integrated graphics / handheld | Chocapic13 Toaster Edition; MakeUp Ultra Fast | 5–20% | Render distance 6–8; shadows minimum; no volumetric lighting |
| Modern integrated graphics (recent laptop iGPU) | MakeUp Ultra Fast; Sildur’s Vibrant (Lite) | 10–25% | Render distance 8; disable reflections; shadow resolution low |
| Entry dedicated GPU (GTX 1050-class) | Complementary (Reimagined); BSL (Low); Sildur’s (Lite) | 15–35% | Render distance 8–12; shadows on but soft; reflections off or low |
| Mid dedicated GPU (GTX 1650-class and up) | Complementary (higher preset); BSL; Sildur’s (Fast) | 25–45% | Render distance 12; reflections low; volumetric lighting only if frames allow |
Note that these are percentage ranges, not fixed numbers, because shader cost scales with resolution and render distance. Running at 720p instead of 1080p can cut a shader’s GPU cost dramatically — often by 40 percent or more — which is why dropping resolution is the fastest single fix for a struggling machine.
Step 3: Install the loader before the pack
Shaders don’t run on vanilla Minecraft; they need a loader. The two mainstream options are Iris (lighter, built for performance, often paired with Sodium) and OptiFine (the long-standing all-in-one that also handles other optimizations). For a low-end PC, Iris plus Sodium is generally the faster combination because Sodium’s rendering overhaul frees up headroom that the shader then consumes. Neither loader is hard to install, but you must match the loader version to your game version exactly — a mismatch is the single most common cause of “the shader won’t appear in the list.”
Step 4: Install the shader pack correctly
- Download the shader pack as a .zip file. Do not unzip it.
- Open your game folder and find the
shaderpacksdirectory. With Iris or OptiFine installed, this folder exists at the top level of your game directory. If it doesn’t, create it or launch the game once with the loader installed so it generates. - Move the .zip into
shaderpacks. Do not place it inside a subfolder. - In game, go to Options → Video Settings → Shaders, select the pack from the list, and click Apply.
- If the pack does not appear, the usual causes are: the .zip contains a nested folder (re-zip so the pack files sit at the root), the loader version doesn’t match the game version, or the download was incomplete.
Step 5: Tune in this order
Once the pack is running, change settings one at a time and re-check your frame rate after each change. This order gives the biggest savings first:
- Render distance — the single largest performance lever. Dropping from 12 to 8 chunks saves more than most in-shader toggles combined.
- Shadow resolution / shadows off — the most expensive shader effect. Turning shadows off can nearly halve a pack’s cost, though it removes the most dramatic visual improvement too. Lowering shadow resolution instead is the better compromise.
- Reflections — screen-space reflections on water are costly; disabling them keeps water animated but removes mirror-like surfaces.
- Volumetric lighting / god rays — beautiful and expensive. Enable only if you have spare frames after the above.
- Bloom and antialiasing — small costs individually, but they add up. Antialiasing in particular multiplies with resolution.
- Resolution — the nuclear option. Dropping from 1080p to 900p or 720p yields a large, immediate gain and is far less noticeable on a small laptop screen than on a large monitor.
What wears out and what to watch for
Shader packs are software, so the “durability” question is about maintenance rather than materials. The things that break first are: game-version compatibility (a pack compiled for an older version may fail or render incorrectly after an update), loader compatibility (a pack that works with one loader may not with another), and config drift (settings you changed months ago and forgot about, quietly costing you frames). The fix for all three is the same: when the game updates, re-check that your pack, loader, and game version all match, and consider keeping a second, lighter pack installed as a fallback you can switch to in seconds if a new version misbehaves.
For the physical items in this guide — lamps, sunglasses, backpacks, figures — the wear pattern is more predictable. Lamps are LEDs, so the light source outlasts almost everything else; the puller cord and the switch are what fail first, which makes tugging gently rather than yanking worth the habit. Sunglasses lose their lens coating through cleaning with the wrong cloth; use a microfibre cloth and avoid wiping on a shirt, which is where most scratches come from. Backpacks wear at the zip and the strap anchors long before the fabric gives out. And collectible figures don’t wear at all — they just get knocked off shelves, which is an argument for the 14-inch lamps, since they’re harder to lose and have a second function.
The upgrade path
Think of the packs in this guide as a ladder rather than a set of competitors. Start at Toaster or MakeUp Ultra Fast, confirm smooth play, then move to Sildur’s Lite or Complementary’s lowest preset, then step up presets within the same pack as you upgrade hardware. Sticking with one pack family as you climb means your settings carry over and you learn exactly which toggles cost what on your specific machine — knowledge that transfers even when you eventually change packs.
Frequently Asked Questions
Can a low-end PC run shaders at all?
Yes — almost any machine that runs Minecraft can run at least a lightweight shader pack. The catch is that “running” a shader is a range rather than a yes/no: a pack like Chocapic13’s Toaster Edition or MakeUp Ultra Fast cuts far fewer frames than a full ray-traced setup, and by reducing render distance and resolution you can make even a modest shader playable. If vanilla Minecraft already struggles at your normal settings, fix that first by lowering render distance before adding a shader.
Which shader gives the biggest visual improvement for the smallest frame-rate cost?
In general, colored block lighting is the cheapest effect with the largest perceived change, which is why MakeUp Ultra Fast feels like such a big upgrade despite being one of the lightest packs here. Complementary Shaders on its lowest preset delivers more total beauty, but costs roughly double. The best-value single change you can make is enabling colored lighting and animated water while leaving shadows and reflections off.
Is shader performance affected more by the GPU or the CPU?
Shaders are almost entirely GPU work, so the GPU is the deciding factor for shader performance. The CPU matters for render distance, entity count, and simulation — which is why a machine with a weak CPU and a decent GPU can often run a moderately heavy shader fine at a low render distance, while a machine with a strong CPU and weak integrated graphics cannot. If your frames are bad before you install a shader, the problem is usually CPU-side.
Do I need OptiFine, or is Iris enough?
Either works, and you only need one. Iris is generally the lighter alternative and pairs well with the Sodium rendering mod, which is why performance-focused players often prefer it. OptiFine remains the more familiar all-in-one option and includes features Iris doesn’t. What matters most is that your loader version matches your game version exactly — a mismatch is the most common reason a shader pack won’t show up in the list.
Why doesn’t my shader appear in the shader list after I download it?
Three causes cover almost every case. First, the .zip may contain a folder inside it, so the actual pack files aren’t at the root — you need to re-zip so the pack’s files sit at the top level. Second, the pack may be built for an older or newer game version than the one you’re running. Third, the file may be partially downloaded or corrupted. Check those three in order and the problem usually resolves without reinstalling anything.
Should I lower my render distance or my resolution first?
Lower render distance first, because it reduces both CPU and GPU load and is the largest single lever available. Drop from 12 chunks to 8, then to 6 if needed. Resolution is the bigger hammer — going from 1080p to 720p can cut shader GPU cost by roughly 40 percent or more — but it’s more visually obvious, so it’s better kept as a second step, especially on a large monitor where the softness is more apparent.
Can I run shaders on Minecraft Bedrock or Pocket Edition?
Bedrock and Pocket Edition handle shaders differently from Java Edition, and support depends on platform and version rather than on the pack itself. Many shader packs in this roundup are Java-oriented. On Bedrock, visual overhauls are typically delivered through platform-specific means rather than the same pack files, so check compatibility for your exact platform before assuming a Java shader pack will work.
Do shader packs cost money?
Nearly all the well-known community shader packs are free downloads; some creators accept optional donations. Beware of paid listings that look like shader packs but deliver something else — if a store page is selling a shader as a physical or bundled product, check the description carefully. The loaders themselves are also free. If you’re spending money, the more sensible targets are hardware upgrades or the themed accessories in this guide.
Will shaders damage my PC?
No. Shaders are a rendering configuration, not an overclock, so they don’t stress hardware beyond its rated limits — they simply use more of the GPU than vanilla does. A machine that’s clean and adequately cooled will run them indefinitely. The realistic downside is heat and fan noise on a laptop, since sustained GPU load raises temperatures; make sure vents aren’t blocked and consider capping your frame rate so the GPU isn’t working harder than it needs to.
Final Recommendation by Situation
If you’re on a laptop with integrated graphics and nothing else: install MakeUp Ultra Fast. It gives the clearest visual improvement of anything that will actually stay smooth, and it’s the right first step before you know your machine’s limits.
If your machine is genuinely at its limit and you can’t afford a single dropped frame: go with Chocapic13’s Toaster Edition. It’s the safest choice, and it doubles as a diagnostic for where your hardware ceiling sits.
If you have an entry-level dedicated GPU and want the biggest transformation: Complementary Shaders on its lowest preset is the best overall pick — the best-looking result that still runs smoothly on a GTX 1050 Ti or RX 570 class card.
If you want a cinematic, stylized look and can spare a little headroom: BSL Shaders on the low preset, or Sildur’s Vibrant Lite if you prefer heavier saturation and a lighter frame cost.
If you’re building out the setup around the game: the 14-inch Diamond Ore or TNT block lamps are the better accessory spends because they light a desk as well as decorate it, the Bee Nest and SoftGlo models suit a bedside, and the cap-and-sunglasses set is the one item here that’s worth owning for the hours you spend away from the screen.